Orders over $99 may qualify for free shipping.

Fastening Methods for Trellis Wire
Securing high-tensile trellis wire properly is critical for building a stable, long-lasting support system. Whether you’re constructing a vineyard or orchard trellis, choosing the right fastening method helps maintain tension and prevents future failures. This guide outlines three proven techniques for fastening MAX-TEN 200 High-Tensile Wire using crimp sleeves—each suited for specific use cases.
Method 1: End Post Fastening
Loop the line wire around the end post, allowing approximately 24 inches of extra wire beyond the post. Thread two crimp sleeves onto the wire and slide them back along the tail about 24 inches. Bring the wire end back to the post.
- Wrap the wire tightly around the post
- Make a 100-degree bend 6 inches from the end of the wire
- Align the wire ends so they run parallel near the crimp sleeves
- Ensure the loop sits at the desired height on the post
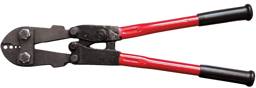
- Use a crimping tool to secure both sleeves
This method retains up to 100% of the breaking strength of MAX-TEN 200 wire and is ideal for high-tensile applications requiring a solid end termination.

Method 2: Installing an In-Line Strainer Near an End Post
To add tension control near an end post, a short wire section is used to connect the line wire to an in-line strainer.
- Cut a 36-inch piece of wire and loop it around the end post
- Thread two crimp sleeves onto the wire, sliding them back about 6 inches
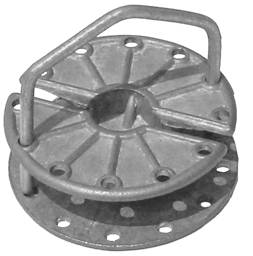
- Insert the free end through the holes in the shank of an in-line strainer
- Thread the wire back through the crimp sleeves and crimp them firmly
- Feed the line wire through the strainer cog and trim any excess
- Attach a strainer handle and rotate the cog to secure the wire in place
For tightening instructions, refer to the sections on "Stringing the Line Wires" and "Tensioning the Wire" in our trellis guide.

Method 3: Installing an In-Line Strainer in a Line Wire
This method allows you to place a strainer anywhere along a continuous fence line.
- Cut the line wire and insert one end 4 to 6 inches into the ground temporarily
- On the free end, thread two crimp sleeves and slide them back about 24 inches
- Make a 90-degree bend 6 inches from the wire end, followed by a 45-degree bend 3 inches from the tip
- Insert the bent end through the holes in the strainer’s shank
- Bend the wire back onto itself and slide the sleeves forward 3 inches to enclose the tip
- Crimp both sleeves securely
- Finally, thread the other end of the cut wire through the cog hole as described in Method 2
This is a convenient method for mid-line tension control and quick wire repair.

Final Words
Choosing the right fastening method is essential for building a long-lasting and effective trellis system. Each method above ensures secure connections and helps you maintain proper tension across your fence line. Whether you're terminating wire at an end post or adding strainers for mid-line tensioning, the correct use of crimp sleeves and tools ensures maximum strength and reliability.
Related Items