Orders over $99 may qualify for free shipping.
Safe-Fence Installing End, Corner, and Gate Posts - Complete Guide
Installing end, corner, and gate posts is one of the most important steps in building a durable and safe electric fence. These posts act as the anchor points of your fencing system, absorbing the most tension and supporting the structure in critical spots. Whether you're fencing flat ground or navigating changes in elevation, getting these posts right is essential for fence longevity and animal containment.
Where to Install Support Posts
Support posts must be installed at:
- All gate openings
- Ends of fence runs
- Fence corners
- Terrain changes (low and high points)
- Spans longer than 825 feet
These locations experience the highest strain and need solid reinforcement to maintain tension and prevent sagging or shifting over time.

Recommended Post Type and Depth
Use 4" x 4" square or 5"+ round pressure-treated wood posts for maximum strength. These posts should be set at least 3 feet deep in the ground and secured with concrete for a long-lasting installation.
⚠️ Don't skip the concrete. It adds crucial stability and helps prevent shifting, especially in areas with frequent moisture or livestock activity.

Installation Steps for End, Corner, and Gate Posts
Dig the Hole
Create a 3-foot-deep hole. For best results, make the hole 9 inches wide at the top and 12 inches wide at the bottom. This tapered design offers better resistance to pulling forces.
Add Gravel for Drainage
Place 3 inches of gravel at the bottom of the hole to support drainage. Insert the post, check for vertical alignment using a level, and then add another 3 inches of gravel to help stabilize the post.
Pour Concrete
Fill the hole with concrete mix, stopping about 6 inches from the surface. This provides a firm base that resists lateral movement.
Backfill with Soil
Once the concrete is in place, fill the remaining top portion with soil. Mound the soil slightly around the post base to direct rainwater away and minimize rot.
Wait Before Tensioning
Allow the concrete to set for at least 24 hours before applying any tension or attaching Safe-Fence components.
Enhancing Appearance with Post Sleeves
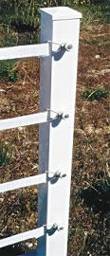
For a clean, polished look that enhances curb appeal and protects the wood underneath, use SAFE-FENCE JR4005 Wood Post Vinyl Sleeves over your installed posts. These sleeves are easy to apply and elevate the overall appearance of your fence line.
Final Words
Taking time to properly install your end, corner, and gate posts is a small upfront effort that pays off with a stronger, longer-lasting fence. From digging and drainage to concrete anchoring and vinyl sleeving, each step plays a vital role in the stability of your Safe-Fence system.