Orders over $99 may qualify for free shipping.
How to Test the Ground Bed in an Electric Fence System
Proper grounding is essential for an electric fence system to work correctly. The ground bed—the set of ground rods where the current returns to the energizer—is what allows the fence to deliver a consistent and effective shock. But even the best setups can degrade over time due to weather, soil changes, or corrosion. That’s why testing the ground bed at least once a year is a key part of fence maintenance.
This guide will walk you through a simple procedure using basic tools to ensure your ground system is working as it should.
Why Ground Bed Testing Matters
The ground bed is often the most overlooked part of an electric fence system, yet it’s one of the most critical. Poor grounding can lead to weak or inconsistent shocks on the fence, reduced control over animals, unnecessary strain on the energizer, and increased likelihood of stray voltage or interference. Testing helps you spot problems early—before they affect fence performance or create safety issues.
What You’ll Need to Test the Ground Bed
Before starting the test, gather the following items: several metal rods (approx. 4 feet each) to simulate heavy load on the fence by shorting it, a digital fence voltmeter or fence tester with ground probe and red clip, and access to the energizer/charger. These tools are all widely available through fencing supply stores, including Kencove's testing tools.
Step-by-Step Ground Bed Testing Procedure
1. Turn Off the Energizer
Start by switching off the charger or energizer completely to ensure safe setup.
2. Short-Circuit the Fence
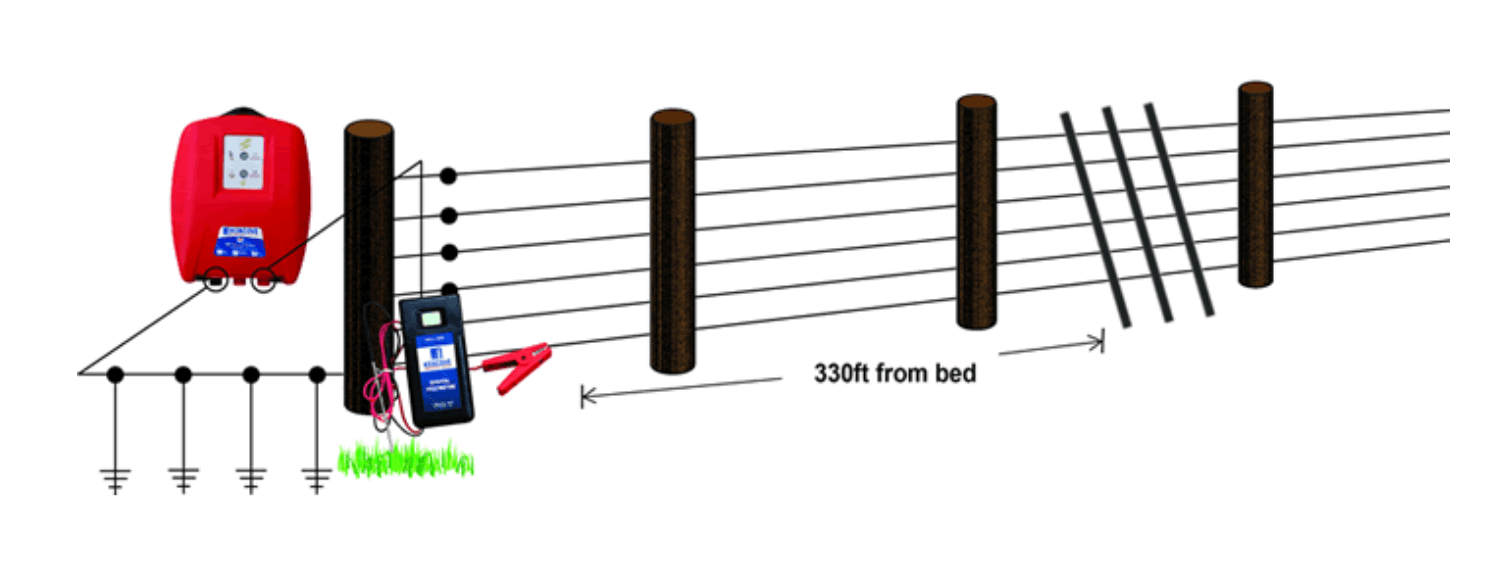
Lean multiple metal rods or stakes against the electrified wire approximately 330 feet (100 meters) from the ground bed. This simulates a large animal or vegetation touching the fence, lowering voltage to around 1,000 volts. Tip: Add more rods if needed until the fence tester confirms a voltage of approximately 1,000 volts.
3. Turn the Energizer Back On
Switch the energizer back on and re-check the fence voltage. If it still reads above 2,000 volts (2 kV), add more rods to ensure the system is under proper simulated load.
4. Test the Ground System
Insert the voltmeter’s ground probe directly into the soil near the final ground rod in your grounding array. Then, clip the voltmeter’s red lead to the last ground rod.
Expected result: The voltage reading should be less than 0.3 kV (300 volts).
What the Results Mean
Below 0.3 kV: Your ground system is performing well and effectively returning current to the energizer.
Above 0.3 kV: Your ground bed may be inadequate. Consider adding more ground rods, improving soil conductivity (e.g., watering dry ground), or using ground enhancement materials.
How Often Should You Test?
Testing should be performed at least once per year, ideally during dry weather when grounding is most likely to be compromised. Also test if animals start challenging the fence, you notice weak or inconsistent shocks, or you’ve moved the energizer or made fence layout changes.
Common Grounding Fixes if Voltage Is Too High
If the test shows your grounding system isn’t up to standard, consider these fixes:
- Add more ground rods spaced 10 feet apart in a straight line
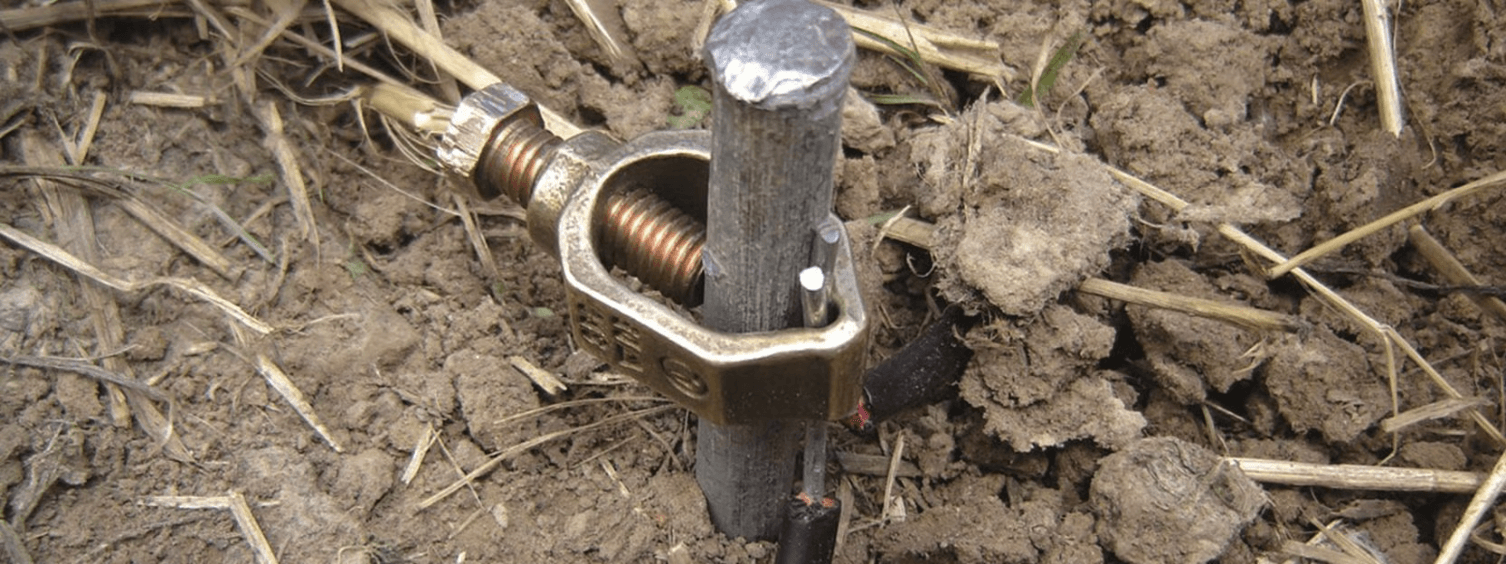
- Use galvanized or copper-clad rods for better corrosion resistance
- Improve soil conductivity by watering dry areas or applying bentonite
- Ensure rods are fully driven in and not obstructed by rock or hard soil
Testing the ground bed is a quick and simple way to ensure your electric fence operates at full strength. With just a voltmeter and a few metal rods, you can simulate a fence load and check whether your system is returning current properly.
If voltage is too high at the ground rods, it’s a clear signal to improve your grounding setup. Need help choosing the right testing tools or ground rods? Contact Kencove for expert advice and support.
Related Items