Orders over $99 may qualify for free shipping.

Poultry Netting Guide: Setup, Benefits, and Predator Protection
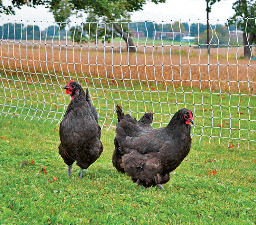
If you raise chickens, ducks, or other poultry, fencing isn’t optional—it’s essential. From predator protection to managing your flock’s movement, poultry netting offers one of the easiest and most effective ways to keep birds safe and contained. Whether you're a backyard hobbyist or a small-scale poultry farmer, electric poultry netting makes creating secure enclosures fast, simple, and flexible.
In this guide, we’ll walk you through the key benefits of poultry netting, how to set it up, and why Kencove’s USA-made netting is a trusted choice for reliable protection.
Benefits of Poultry Netting
1. Quick Setup, No Tools Required
One of the biggest advantages of poultry netting is how fast and simple it is to install. With built-in step-in posts, no digging or extra hardware is needed. In most cases, a single person can set up an entire fence line in 10 minutes or less.
2. Portable and Reusable
Poultry netting can be taken down, moved, and reinstalled wherever needed. This makes it ideal for:
- Rotating chickens through fresh grass
- Setting up seasonal garden barriers
- Moving mobile coops or brooders
It rolls up easily for storage and can be reused season after season.
3. Protects from Ground and Air Predators
Electric poultry netting provides a psychological barrier for both your birds and unwanted visitors. It’s effective at deterring:
- Foxes, raccoons, and coyotes
- Dogs and stray animals
- Birds of prey when paired with overhead netting or a covered run
Graduated spacing near the bottom helps prevent small predators from squeezing through.
4. Safe for Poultry
Unlike traditional wire fencing or hard barriers, electric netting is flexible and designed with poultry safety in mind. The shock is brief and non-lethal, helping birds learn boundaries without harm. It's also visible enough to prevent accidental entanglement or injury.

Common Uses for Poultry Netting
- Backyard flocks in suburban or rural areas
- Pasture rotation systems for meat birds or egg layers
- Garden perimeter protection from curious hens
- Temporary quarantine areas for new or sick birds
- Predator control in high-risk areas (especially at night)
How to Set Up Poultry Netting
Setting up your net is easy—here’s how to do it step-by-step:
1. Choose Your Fence Line
Pick a flat or gently sloping area with access to power. Clear tall grass, sticks, or thick weeds that could touch the net and drain power.
2. Unroll the Net
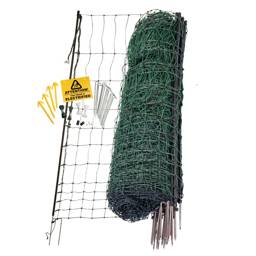
Keep the bundle together, untie the green string, and drop the net away from the posts. Do not remove the string—it will be needed to re-tie the net for storage later.
3. Lay Out the Fence
Walk your fence line while letting the posts drop one by one. This keeps the net from tangling and ensures you follow your planned enclosure shape.
4. Step in the Posts
Press each step-in post into the ground at a 90° angle to the fence line. Lightly tension the net between each post to keep it upright and neat. Use a rubber mallet if working with hard or rocky soil.
5. Connect to Power
Use a low-impedance energizer with at least 0.25 joules of output per net. Connect:
- Orange jumper clip to the net
- Green jumper clip to your ground rod
- Plug in your energizer or connect it to your battery system
For dry soil or poor grounding conditions, consider a Positive/Negative net, which completes the circuit within the net itself.
For a full walkthrough on powering your net, see our How to Install Kencove Electric Netting guide.

Why Choose Kencove Poultry Netting?
Kencove Poultry Netting is proudly manufactured in our Pennsylvania facility, giving us complete control over quality, availability, and shipping speed. With same-day shipping available on many nets, you're never waiting long to get started.
What sets our netting apart:
- Made in the USA
- Stainless steel conductors for durability and consistent shock
- Semi-rigid vertical stays to prevent sagging
- Non-conductive bottom lines to reduce shorting
- Expert customer support when you need it
We also offer a full line of fence energizers, posts, and installation tools—everything you need to get up and running fast
Conclusion
Whether you’re raising a few hens or managing a pastured poultry setup, electric poultry netting offers a practical, reliable way to protect your flock. It’s easy to set up, simple to move, and built to perform in real farm and backyard conditions. With Kencove’s poultry netting, you can focus less on fencing—and more on raising happy, healthy birds.
Related Items