Free Shipping on qualified items.
Click here for more details


BLOG

The Anatomy of an H Brace – Part 1
A fence is only as strong as its bracing. Period.
High tensile fencing is a strong material in its own right. It’s only appropriate that it requires rigid bracing to match its strength. Bracing is the backbone which supports the rest of the fence. The braces used when constructing high tensile fence are called “H braces,” due to their shape containing two vertical posts and a horizontal post spanning the gap between them. These H braces are used at fence corners, extreme changes in direction, terminations at gate openings, and other unique situations. This blog will help hone your ability to build hardy H braces.
Helpful Tips and Tools:
- Fences under 54” tall, comprised of one to six strands, only require single H braces. Fences over 54” tall, with 7 or more strands, will require double H braces at each location.
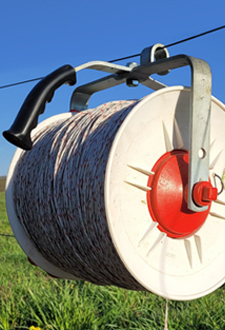
- Installing your H braces around the perimeter will provide the key pivot points of the fence design. A guide wire strung about 4” from the ground from brace to brace will serve as a terrific guide wire for driving straight line posts with pleasing aesthetics.
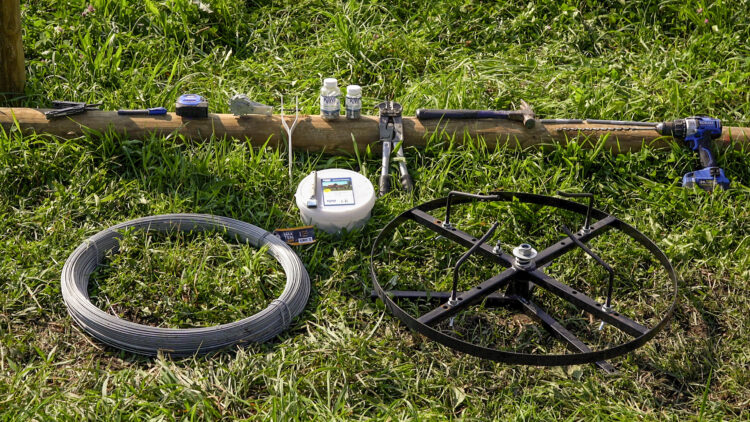
- Tools for the job:
- Wire cutters, pliers, crimp tool, hammer, tape measure, strainer handle, chain saw (if posts need trimmed), drill, 3/8” auger drill bit, marker, spinning jenny
Post Principles
As a rule of thumb, tapered posts should be driven with the narrow end into the ground. Driving posts in this manner ensures post diameter grows with depth which makes for a minimal soil displacement and a secure hold – like driving a wedge. If you find yourself digging or using an auger without the use of a post driver, then it is recommended to install the posts with the larger end in the ground and at least 42” deep. This post orientation will provide better holding strength in the case of holes being dug and loose soil being packed around the post. You can use a Post Tamp to get this soil tight against the post. There is a substantial difference in holding power between driven posts and hand-dug posts. Driven posts are five times more secure than hand-dug posts! Whenever possible, use a post driver - your back and your fence will last longer.
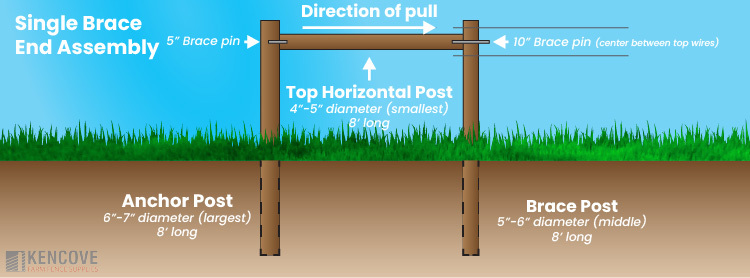
Proper post size is important to the structural integrity of your fence. H braces use a few different sizes of posts to achieve optimal strength. Since height of fence changes from application to application we will refer to post diameter to make distinctions. Typically, an eight-foot-long post is used to achieve a final fence post height of 52” and below. Corner and end posts (termination posts being braced on only one side – such as gate openings) are recommended to be 6”-7" diameter tapered posts (P6x8TCP). These posts will be the anchor and pivot points of the fence. Drive these posts narrow end into the ground on your mark. These posts can be set with a slight “outside lean” of 1”-2” past vertical, meaning they lean away from or against the direction of pull. This helps to ensure your bracing is not pulled inward past the vertical plane, which would compromise the strength of the bracing and fence.
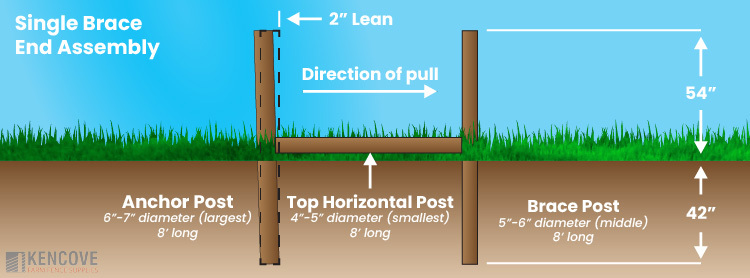
Secondary vertical posts are recommended to be 5”-6" diameter tapered posts (P5X8TCP). Vertical support posts are placed opposite the corner or end post. Distance between the corner/end post and the secondary vertical post is important! This gap, to be filled by the horizontal post, should be twice the finished height of your fence. For a four-foot-tall fence, the H brace assembly would use a full eight-foot post as the horizontal. To get the proper distance, you can measure or simply lay your horizontal post of appropriate length between the corner/end post and the secondary vertical post. You know the ole saying “check/measure twice” to ensure the horizontal will fit snug. The horizontal brace can always be trimmed for a snug fit, but it cannot be stretched to fill a spacing that was made too wide. Once you’ve established this distance, the secondary vertical post can be aligned and installed.
The horizontal brace post plays the supporting role that unites the strong anchoring efforts of the previously installed vertical posts. Horizontal brace posts are recommended to be 4-5" tapered posts (P4X8TCP) with the larger end against the 6-7" corner/end post and the smaller end against the 5-6" secondary vertical post. As previously stated, the length of this post should be twice the height of the fence. i.e. a final post height of 52” or less we recommend the horizontal post be 8’ minimum.
Prep for Pins
Before you install the horizontal post, determine and mark the height locations of the wire.
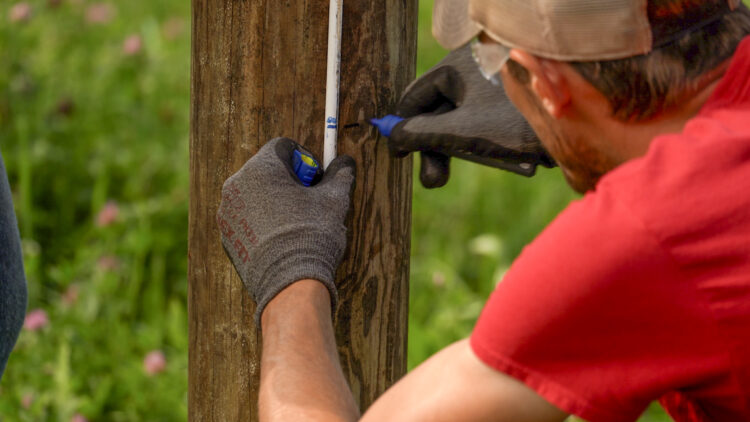
The horizontal brace post will ideally be installed between the marks of the topmost wire and the next wire below. For example, if the top strand is 48” from the ground and the next wire down is 38” your pin placement would be you could install the horizontal post around 43” from the ground. Ideally, this mark should fall within 7” to 10” from the top of the post. Adjustments can be made to be sure electrified wires will not run directly over the face of the horizontal post. This height can be marked on the outside of the secondary vertical post and the inside of the corner/end post. If a second set of hands is available, the horizontal post can be held up and centered on that mark, allowing you to see if it needs trimmed to fit the gap, as well as, to place marks where the bottom of the horizontal post meets the two vertical posts. Those indicators would be a quick reference during installation.
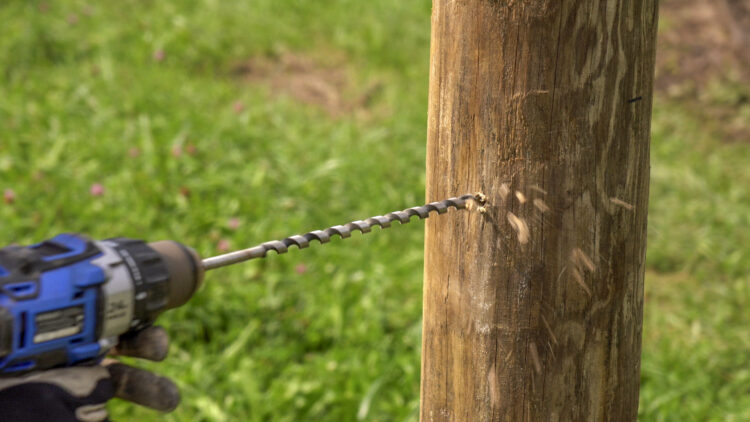
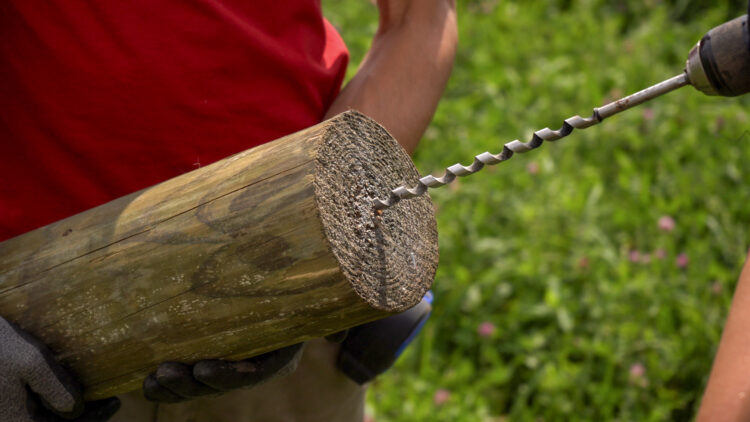
The horizontal post will be held into place by 3/8” brace pins which require the use of an auger bit to drill pilot holes (TDB3813). At corner posts or end posts, where pins will not be driven the full width of a post or show an exposed end, a 5” pin (H5PE) will be used. At secondary vertical posts, 10” pins (H1PE) will go through the entire post with a 1” to 2” tail exposed on the outside of the brace. This tail will hold the upper end of the brace wire. To get started, auger a 2.5” deep hole into the corner/end post at the mark indicating the center of the horizontal post and tap a 5” pin into this hole. Similarly, drill into the center of the larger end of the horizontal post about 2.5-3”.
Now, align the hole in the horizontal post with the pin protruding from the corner/end post and push or tap the horizontal post onto the pin. With this end secure, you can make a final inspection of the overall length of the horizontal post and trim if needed.
Once the horizontal is an appropriate length, position it according to the markings on the secondary vertical post and drill all the way through from the outside of secondary vertical post into the first few inches of the horizontal post, hitting it as close to center as possible. Try to drill as level as possible. Juggling the unattached end and drilling from the outside can be tricky, and often goes better with a second person present. However, if you find yourself attempting this solo, staples can be driven under the horizontal post to hold it in position while you focus on drilling. Next, insert the 10” pin from the outside and tap it into the horizontal post with a hammer until 1” to 2” of the pin remains.
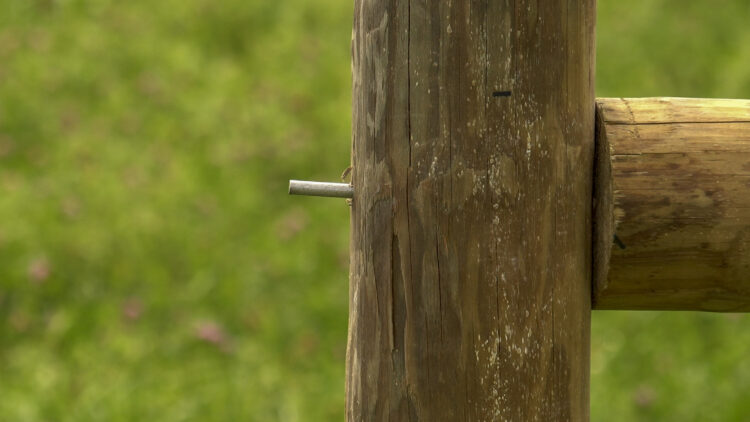
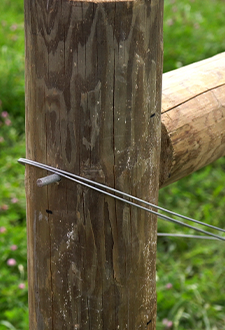
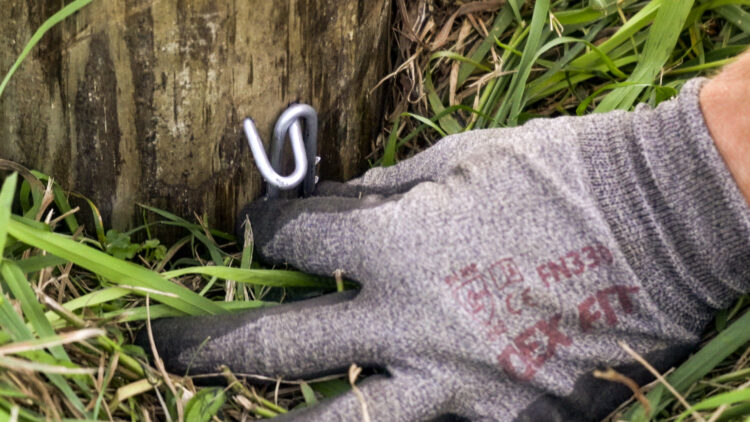
This exposed pin will act as the upper holder for the diagonal brace wire. A lower brace wire holder is also needed at the corner/end post. Drive a staple horizontally into the outside base of the corner/end post 2” off the ground. Do not drive this staple all the way in order to allow room for a “floating” staple. One leg of the floating staple slid into the opening of the holding staple will create a smooth surface for the brace wire to slide on, therefore preventing the brace wire from digging into the post and creating unnecessary friction when tensioning the brace wire.
At this point, your H brace is starting to resemble a real fence! Brace wire and tension will add the final touches of integrity.
Time and labor invested into building bracing will not be wasted, it’s worth the effort to do it correctly. After all, a properly built brace displays a fence that is your hand-written signature on the landscape that can be read for generations. Build with pride!