Subtotal $0.00

Resources


Installing Electric Rope Fence
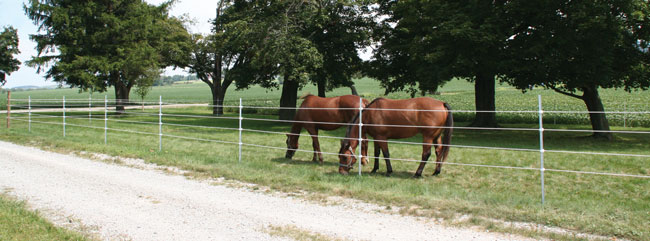
Step 1 – Install Fence Posts
After careful consideration and planning, start by installing end and corner posts which should be a minimum 5" diameter and set 3ft to 4ft in the ground. These posts can be either concreted (allow concrete to cure before tensioning) or firmly tamped. Round posts are stronger and less likely to warp than square posts.
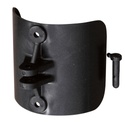
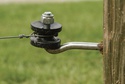
Step 2 – Install Corner Insulators
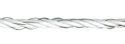
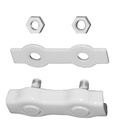
Attach lag screws (ILCW) to end posts, and use Corner Collar insulators (ICPW) on corner posts. Attach and pay out one strand of rope (RO4) as a guide. You can use this guide for placement of line posts, which are typically spaced 10 to 15 ft. apart. The number of strands and spacing you use depends on your livestock and conditions. The most common rope fence Kencove sells is four strands. The rope can be run as one continuous length or cut and spliced at every end.
Step 3 – Install Line Post Insulators
Using spacing from the ground up 20" 10" 10" 10" gives a 50" high fence. Attaching insulators to the line posts is part science, part art. After marking each post, but before permanently attaching insulators, step back and adjust out peaks or valleys. This will enhance the smooth flow of your rope fence. Pull all strands tight and secure with a Rope Clamp (CWBT). Final tensioning can be done with an online tensioner (SSDR).
Step 4 – Electrify the Fence Line
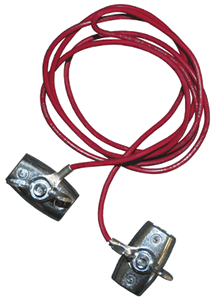
Install a low-impedance energizer. To insure continuity of the electric pulse individual ropes must be connected. Leftover rope can be used, or a Kencove rope to rope electric jumper (CRR) will insure good continuity.
Electric Rope Fence
Step 1 – Install Fence Posts
After careful consideration and planning, start by installing end and corner posts which should be a minimum 5" diameter and set 3 ft to 4 ft in the ground. These posts can be either concreted (allow concrete to cure before tensioning) or firmly tamped. Round posts are stronger and less likely to warp than square posts.
Step 2 – Install Corner Insulators
Attach lag screws (ILCW) to end posts, and use Corner Collar insulators (ICPW) on corner posts. Attach and pay out one strand of rope (RO4) as a guide. You can use this guide for placement of line posts, which are typically spaced 10 to 15 ft. apart. The number of strands and spacing you use depends on your livestock and conditions. The most common rope fence Kencove sells is four strands. The rope can be run as one continuous length or cut and spliced at every end.
Step 3 – Install Line Post Insulators
Using spacing from the ground up 20" 10" 10" 10" gives a 50" high fence. Attaching insulators to the line posts is part science, part art. After marking each post, but before permanently attaching insulators, step back and adjust out peaks or valleys. This will enhance the smooth flow of your rope fence. Pull all strands tight and secure with a Rope Clamp (CWBT). Final tensioning can be done with an online tensioner (SSDR).
Step 4 – Electrify the Fence Line
Install a low-impedance energizer. To insure continuity of the electric pulse individual ropes must be connected. Leftover rope can be used, or a Kencove rope to rope electric jumper (CRR) will insure good continuity.
Related Items

- Use with Rope, Braid or Coated Wire
- Made with UV-stabilizers
- Made in the USA
- White or Black, Pack of 10
- Ideal for high-tension applications
- L-shaped 3/8" diameter zinc plated lag screw
- UV-stabilized high grade plastic