Resources
Building Rail Fence
Installer Handling Techniques

As with any installation procedure, we advise you to always be mindful of safety precautions when handling materials and equipment.
Design
Where a new fence is being considered, we recommend at least three fence rails or a mix of fence rails and Kencote wires to give added height and density. In the case of an arena, we suggest that four or five fence rails be installed. Please note the section below on "Preparation of Fence Line for Horserail." To provide improved visibility and strength in an existing fence, it is a good idea to replace the top wires with fence rail. While laying out the fence line, we suggest that you stake the position of all ends, corners and gateways. Next, tension a string line or guide wire so that you can see how the land lays. Then, measure the distances carefully so that you or your installer have a clear understanding of the project and quantities of materials needed.
Preparation of Fence Line for Rail
Care should be exercised in preparing the fence line and the positioning of the line posts. (Try to avoid one post rise or one post dip). The tops of the posts should have a smooth, flowing line even if it means placing a rise post a little deeper or leaving a dip post higher. In extreme cases of undulating terrain, it is better to use a bulldozer to smooth the fence line, taking off the high spots and filling in the dips. Other options include fencing across the top of sharp dips and filling in later with boards or panels. The last, but more difficult choice, is to cut the top or bottom wire of the rail during the tensioning phase. Notch the web and carefully rejoin the wire with crimping sleeves. You can use a chain grab wire puller to assist at this time. The rail should then be stapled to the post again with the standard 2" (50mm) barbed staple or with a flat bracket. Please note that certain steep topography will make it very difficult to use the 4" (111mm) rail. Some installers limit the elevating change to 3 degrees per post.
Post Spacing
While this is largely up to the individual, factors to be considered are:
- livestock pressure
- topography
- firmness of soil and
- corral, arena and/or paddock size.
Installers have found that these factors have indicated a range of between 6 feet(2m) for more intense situations or where the line is curved, such as an arena, and up to 16 feet(5m) for larger in-sheltered areas. The more posts you use, the better it looks.

End Structures
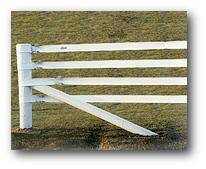
Since the Horserail requires minimal tension to keep it flat and straight, (no excessive tension needed), a single end post with regular bracing is all that is necessary. Use as large an end post as possible, because it's the foundation of your fence. It also helps dwarf or hide the wire tensioners or tighteners.

Tensioning
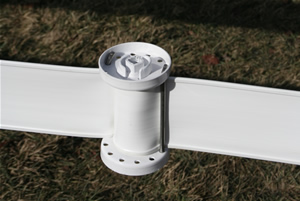
Spoolers are used to tension Horserail and reduce sag. We recommend that the rail be laid out rather than pulled out and that the rails are attached with the proper brackets to every 4th or 5th line post, BEFORE tensioning to the end posts. Install one spooler at the start and end of the fence, for each directional change and for every 33 ft of fence. When tensioning, be careful not to over-tighten and always pull towards you (do not push away from the spooler). Spoolers can be tensioned using a ratchet handle, but the Spooler Handle Set makes tensioning much faster, easier and ensures perfect alignment.


